THE HOW TOS OF KAYAKING

What do you need to know to be a confident Kayaker:
*Definitions: Bow = Front, Stern = Back, Deck = Top, Hull = Bottom
* Paddle: A paddle is as essential as the kayak itself. When choosing paddles, you’ll need to consider the measurement of your torso and the width of kayak you’ll be paddling. There are sizing charts available but generally, body heights over 28 inches will use paddle lengths of 200 centimeters and above, body heights under 28 inches will use paddle lengths under 200 centimeters.
*Lifejacket: A personal floatation device is a critical piece of equipment that you should always have when engaging in any watersport. A lifejacket should fit comfortably snug, meaning it fits well without feeling too tight or too loose.
* Bilge pump: A bilge pump or bailer is necessary in case you need to quickly bail water out of your kayak.

GETTING IN AND OUT OF THE KAYAK
Before you learn how to ride in a kayak, you first need to learn how to get in and out of a kayak. Getting in and out of a kayak can be tricky, but we’re confident that after a little practice, you’ll catch on quickly. There are two different ways which you will likely enter a kayak, getting into a kayak on land or in shallow depths of water, or getting into one that’s already in deeper water. Both options have their advantages and challenges.
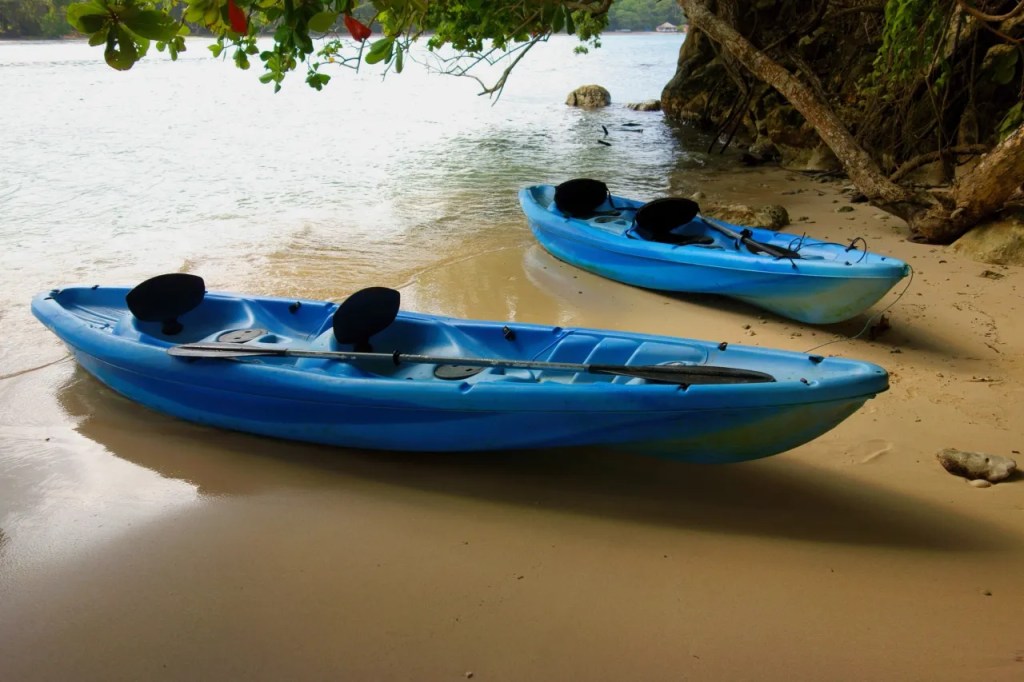
Getting into your kayak from the shore is much easier, especially for those who are learning to kayak. Whether it’s a lakeside, sea shore or riverfront, the best way to begin is to move the kayak as close to the shoreline as possible. You can then sit in the kayak and use your arms to push yourself into the water until you are floating on the surface. If you’re concerned about scratching your hull on the ground, move the kayak into the shallow water and climb in there.
Getting into your kayak from a dock involves a little more skill. Lower your kayak from the dock onto the surface of the water, making sure to keep the kayak parallel to the dock. You can keep your kayak from shifting positions by placing either end of the paddle on the kayak and the dock. As you’re sitting on the edge of the dock, lower your feet into the kayak first. Then, quickly position your body towards the front of the kayak and lower yourself into the seat.
The instructions for how you get out of a kayak are easy to remember — just complete the steps in reverse. When exiting on the shore, paddle your kayak into shallow water or as close to the land as possible. Swing your legs out of the kayak, gain your footing and stand up. When exiting the kayak on a dock, turn your body to face the dock and pull yourself out of the kayak.

PADDLING TECHNIQUES
Once you’ve practiced getting in and out of the kayak, it’s time to learn about paddling techniques. The first step is to ensure you have picked out a paddle of proper length. Our guide to selecting a kayak offers detailed insights on choosing the right paddle length for you.
Before getting into the water, all beginners should first learn how to handle the paddle.The part of the paddle you hold is called the shaft. The proper way to hold a paddle is to place your hands slightly farther than shoulder width apart on the shaft. Oftentimes, one mistake that beginner kayakers make is holding the paddle incorrectly. One side of the blade is concave and should always be facing you. Slice the paddle blade vertically into the water, keeping a relaxed grip on the shaft with your knuckles pointed upward. Keeping this form will put more power into your paddle without exerting more energy.
WHAT ARE THE BASIC TYPES OF PADDLE STROKES?
With paddle in hand, you can now learn basic paddling strokes. There are four essential kayaking paddling techniques you should know — forward stroke, backward stroke, sweep strokes and draw stroke. These strokes will enable you to move forward, backward or sideways in your kayak as well as help you turn around.
· Forward Stroke
This basic stroke moves your kayak forward
1. Submerge one end of the paddle in the water near your toes.
2. Next, propel the kayak forward by pulling the blade back towards your hip.
3. While pulling the paddle blade out of the water, rotate your body forward while dipping the opposite blade into the water.
· REVERSE STROKE
This stroke moves your kayak forward
1. Submerge one end of the paddle in the water between your body and the stern (which is the back of the kayak).
2. Look behind you and propel the paddle forward towards your toes.
3. Allow your body to rotate back into a square sitting position and repeat the process on the opposite side.
· SWEEP STROKES
Use sweep strokes to turn your kayak.
To use a sweep stroke to turn forward:
1. Place the end of the paddle in the water by your toes against the bow, or front, of the kayak.
2. Draw back the paddle in a half-moon arc towards the stern of the kayak.
3. Rotate your torso with the paddle.
To use a sweep stroke to turn backward:
1. Place the end of the paddle in the water against the stern of the kayak.
2. Draw the paddle forward in a half-moon arc towards the bow of the kayak.
3. Rotate your torso with the paddle.
· DRAW STROKE
Use the draw stroke to move your kayak sideways.
1. Stick the blade of the paddle in the water in the direction you want to move and rotate your torso in that direction.
2. The paddle should be far enough out from the kayak that both of your hands are over the water.
3. Pull to draw your kayak towards the blade.

OTHER BEGINNER KAYAK TIPS AND TECHNIQUES
For your first-time kayaking, or if you’re still newer to the sport are heading out on the water alone, we suggest you follow these tips:
- Pick a small lake or pond that is calm and one which you can see the opposite shoreline. Bodies of water that don’t have heavy powerboat traffic are a plus because it will limit the number of unnatural waves you’ll have to face.
- Launch your kayak from a shore that is visible to others on land. If you’re kayaking alone or are with a group that is remaining on the beach, your kayak will be in plain view should you require assistance or emergency help.
- Plan your first few trips to be short and safe. Choose a bright and sunny day that doesn’t have a forecast of rain or high winds to keep your environmental challenges as predictable as possible. Also, know your limits and underestimate the amount of time you can safely kayak before you get fatigued. Like other workouts, you don’t want to overdo your first kayaking trips and make it difficult to paddle back to shore. Limit your first trip to an hour and then extend as you feel comfortable.

HOW DO YOU KAYAK DURING SUDDEN WEATHER CHANGES?
Depending on where you’re kayaking, the weather could change in an instant. Although you planned a trip on a perfect day, you should still be aware of what to know about kayaking during times of bad weather. You may not know how hard it is to kayak in a rainstorm until you’re stuck in one, but there are a few kayaking skills and techniques for beginners that can help you avoid trouble and make it safely back to shore.
You should expect any amount of wind, from a small breeze to a huge gust, to have some effect on your kayak. This is normal, and you can readily compensate for it. To conserve energy, paddle with the wind and not into it if you can. You can also paddle harder, use a rudder or add an extra stroke to your downwind side in order to make adequate wind corrections.
If you lose control of your kayak, don’t fight it. Imagine driving down a road and losing control of your car due to ice, dirt or other slick conditions. Trying to regain control of the vehicle abruptly could cause you to overcorrect and make the situation worse. Instead, it’s best to maintain as much control of the car as possible and move in the direction of the vehicle. The same applies to kayaking. If you suddenly start to spin, move with the kayak and adjust accordingly.
HOW TO RIGHT YOURSELF IN A KAYAK
There’s also a chance your Kayak could roll over, putting you underwater. Staying centered in the kayak and wearing a life jacket will help in this scenario. If you tip without wearing a life jacket however, stay calm and immediately grab the kayak and the life vest if it’s attached to the vessel.
If you tip in calm waters, flip the kayak over by grabbing both sides of the cockpit and climb back in if you are able. If you are unable to do this, grab the kayak and swim back to shore or shallow water. If your kayak tips while you’re in a current, hold the kayak with just one arm. Continue to face upward to ensure you can breathe. Keep your body horizontal to the surface of the water and backstroke to the shore or shallower water.

KAYAKING IN DIFFERENT ENVIRONMENTS
Now that you’ve learned a few kayaking tips and tricks, it’s time to learn some kayaking skills and techniques you can use in different bodies of water. Each environment you choose to paddle contains variables that will impact the way you kayak. For instance, a flowing river may increase your speed naturally while a steady lake will require you to exert more energy to move faster.
Regardless of which body of water you choose to kayak in, it’s a good idea to plan a route ahead of time. If you’re kayaking in a lake or pond, be aware of shoreline areas which you won’t be able to easily access in the event of an emergency. If you’re kayaking down a river or stream, make sure you choose a route with typically calm waters. It’s best to stay away from areas which could become more challenging if you accidentally paddle too far, especially if you’re new to kayaking.
It’s also a good idea to identify spots on your route like bays or accessible shorelines where you can stop to take a break if needed. If you end up off course, make sure you have a nautical map or compass with you. Though GPS and other electronic navigational equipment are helpful, if they were to become inoperable, you would then have a reliable backup with a physical map.
You should also be aware of the many forms of wildlife you may encounter in both fresh and saltwater kayaking excursions. Oceans, inlets or bays may contain sharks or jellyfish. Rivers, streams or lakes could contain snakes, alligators or be frequented by other potentially dangerous wildlife on the shoreline, depending on where you’re kayaking. Before you journey out into the water, discover what species of animals you may encounter and how you can safely share the water with them.

Sections of the above blog may have been duplicated in part or whole from Kayak 101 www.EZdock.com.
